Updated: January 2024 by James Dunworth
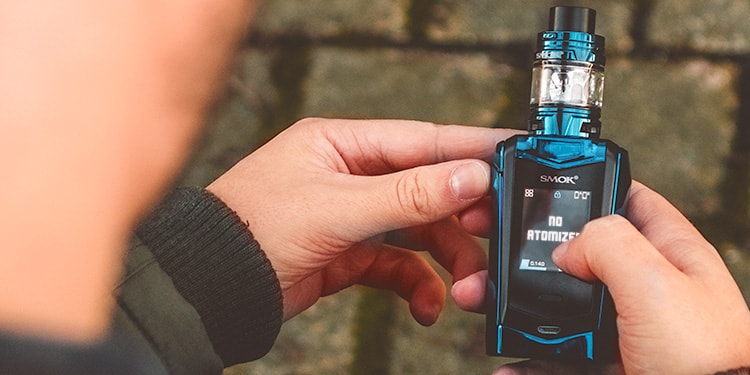
There are few things more frustrating than a “No Atomizer” or “Check Atomizer” message. Your vape tank is filled with e-liquid, your mod is charged, you press the button… and nothing happens.
It’s happened to me a number of times and, chances are, it is happening to you right now! The good news is that this is often a simple connection problem, and is easy to fix and diagnose.
In this post, we’ll take you right the way through the basics of what an atomizer is, and what the “No Atomizer” message actually means, to the different steps you can take to solve the issue.
Also see: 16 Common Vape Device Problems & How to Fix Them
Contents
- What is an atomizer?
- What does “No Atomizer” or “Check Atomizer” mean?
- Isolating the issue
- Atomiser problems with tanks
- Atomiser problems with RDAs
- Atomiser problems with mods
- If all else fails…
- Recap
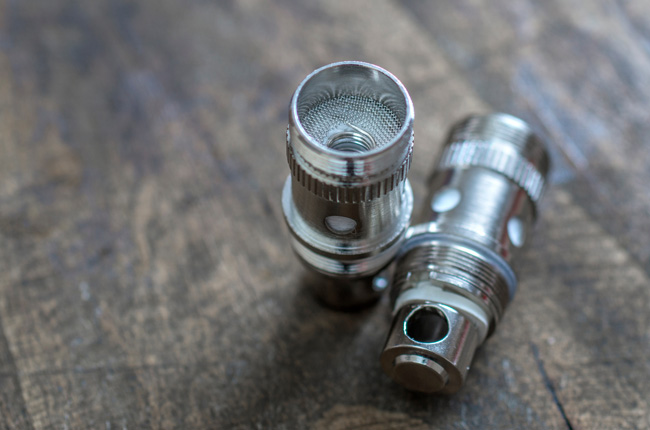
It can first help to define an atomizer!
Sometimes spelt atomiser in the UK, the atomizer sits in your tank and is made up of metal (often in a coil design) and a wick. The term ‘atomizer’ is used interchangeably with ‘coil’. While atomisers vary in design and material, their job is always the same - to heat up and vaporise your e-liquid.
Learn more: A Beginner’s Guide to Coils
When you get the “No Atomizer” or “Check Atomizer” message, it means your mod doesn’t think your tank – or more specifically, your coil or atomizer – is attached to the connection point.
You’ll see the same message when you try to fire a mod without anything attached. However, if your tank and atomizer appear to be attached, it really just means that something is preventing it from making a connection.
It might seem like a strange error sometimes, especially if you’ve been vaping without problems just before it shows up. But connection issues can develop over time, even if you don’t physically move or change anything with your setup. It’s less likely to happen this way, but it does still happen fairly regularly. For example, refilling your tank might slightly move the atomizer head and, over time, can lead to a disconnection.
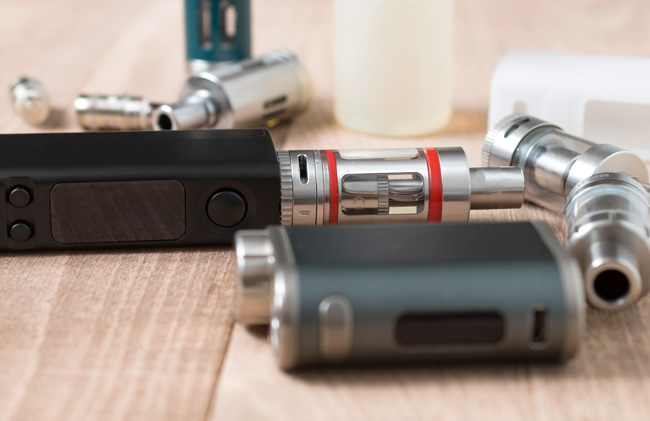
Although it’s probably an issue relating to your tank or atomizer, it’s a good idea to clarify the cause of the problem before you go ahead with a fix. The easiest way to do this is to find another mod or another tank and try switching up your setup.
If your mod works absolutely fine with another tank attached, you know the problem is related to the tank you were using.
If the mod still doesn’t work with a new tank, it’s likely a problem with your mod.
If your tank works with another mod, you know the problem is with the mod itself, not the tank.
If the tank still doesn’t work on another mod, you know it’s a problem with the tank.
In most cases, the problem will be with your tank rather than your mod. So here’s what to do if that’s the problem:
Check your tank connections
The most likely cause of the problem is that something isn’t connected properly.
The first thing to do is to check you’ve securely screwed your tank down onto the connection point of your mod. Simply unscrew your tank, reattach it and give it another try.
On some devices, when you screw on the tank, a message will pop up asking if it’s the same coil you were using previously or a new coil. If this doesn’t happen, just try to fire again and see if you get the same message.
If this doesn’t work, it could still be a physical connection issue, just with your atomizer head (or “coil”) and the tank, rather than with the tank or your mod.
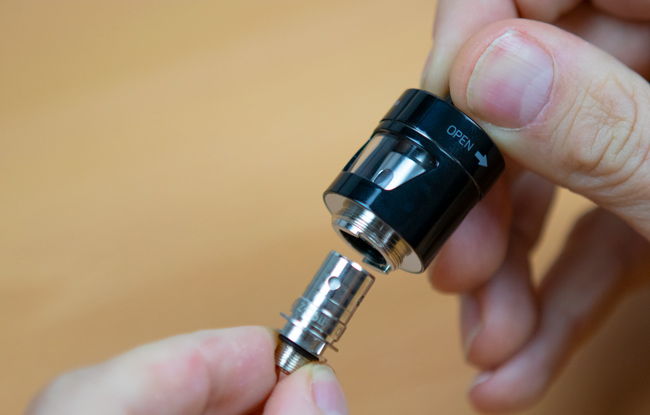
Unscrew the base of the tank to access the atomizer head – in some cases, you might have to empty the juice out of the tank first. Now, find the point where your coil connects to the base of the tank.
For screw-in coils, remove the coil and then screw it back in place, taking care to ensure it connects cleanly and you don’t end up with crossed threading (you can clean the coil and the connections first if you like – since you’re already removing it, you might as well – see the section below).
The easiest way to make sure it’s all lined up properly is to put the atomizer head in place but turn it left as if you’re unscrewing it until you hear a distinctive click as it drops down the start of the threading. When you’ve heard this, you know it’s in position and you can turn it to the right to screw the coil in place. Re-assemble the tank and see if your device fires now.
Clean your coil and connections
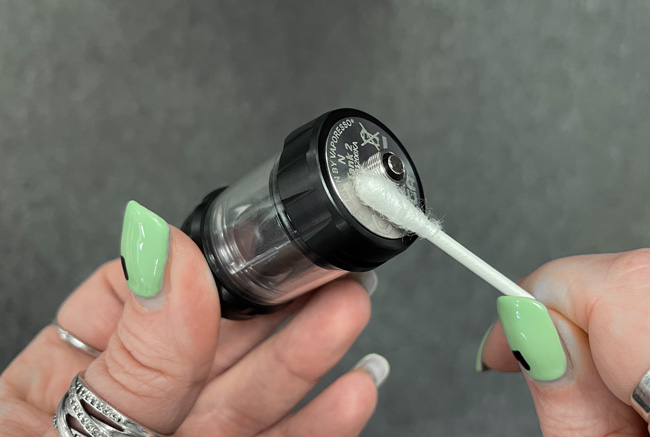
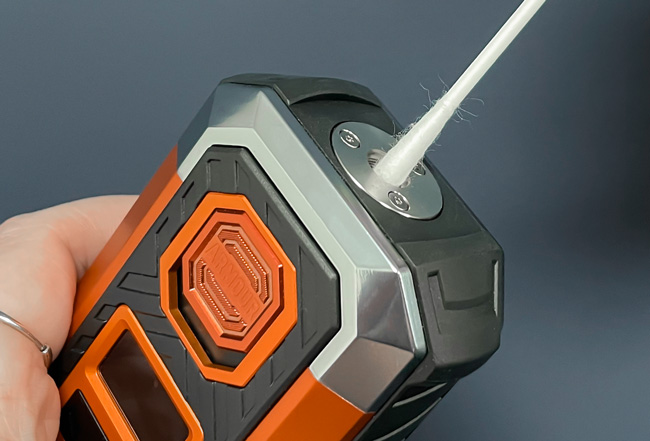
If you’re still having problems – or if you just want to cover all bases – it’s worth giving your atomizer head a quick clean. This doesn’t have to be anything substantial (i.e. there’s no need for a full hot water clean and then leaving it to dry for a day), just get a cotton bud and clean around the base of the atomizer head and the threading, where it makes the connection with the tank. It’s a good idea to clean the tank where the atomizer head is connected as well.
While you have your cotton bud out, you should clean around the 510 connection at the base of the tank too (the part you connect to the mod) and the connection point on your mod. Any debris stuck here could disrupt the connection and lead to the “No Atomizer” message. Similarly, if some vape juice has leaked out, this could be interfering with the connection too. Give it a thorough clean and the problem should be rectified.
Again, reconnect everything and try your device. If everything works, then you’re good to go. If not, read on because it might be a more complicated issue.
Try a new coil
If cleaning and reconnecting hasn’t solved the problem, it’s possible that the coil/atomizer is faulty or just past its prime. Unfortunately, there is no solution to this problem other than trying a new one and making sure it’s connected properly. If this still doesn’t work, either there’s a bigger problem with your tank or (more likely) it’s something to do with your mod.
Look at the tank’s connection point
Although these issues are less common, thanks to most modern mods featuring spring-loaded contact points, the connection point on your tank might be too far recessed to make a good connection with your mod.
Look at the 510 connection and you should see a (usually gold-plated) contact point protruding out from the middle of the threading underneath. In other words, the contact point should be slightly lower than the base of the threading.
On most modern devices, this will be a flat, smooth surface and unfortunately, there isn’t much you can do if it’s pushed too far in. However, on older tanks, there is often a point for a flat-head screwdriver on the contact point. If there is, unscrew this very slightly – just enough so it protrudes below the threading – and try to connect again. Be careful with this, though, as unscrewing it too much can cause other problems since it’s also holding the bits of your tank together.
If you’re vaping with a rebuildable atomizer of some type (whether a dripping atomizer, RDA, or a rebuildable tank) the advice is largely similar to the above, but there are a couple of extra potential issues to consider.
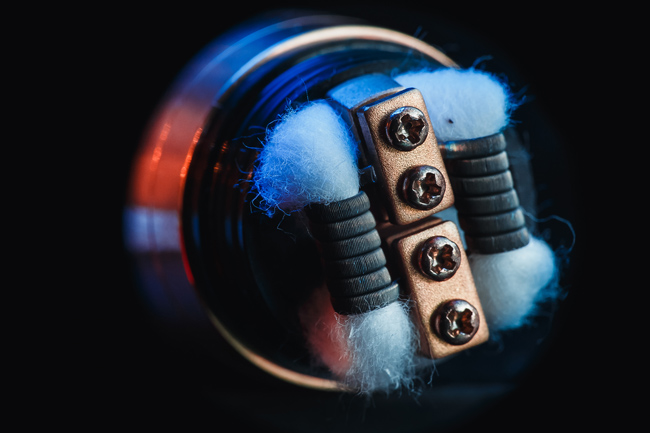
Are your post screws tightened?
Aside from the issues you might encounter that overlap with sub-ohm tanks (e.g. a poor connection between the atomizer and mod, dirty connections or a recessed 510 connector), one of the main things you should check is whether the screws you use to connect your coil to the post are tight enough.
As with atomizer heads coming loose over time, these can loosen during general use. Provided you can’t see an obvious problem (e.g. one of the “legs” of your coil being completely out of the post) just grab your screwdriver and tighten them. Give the device another try to see if this solves the problem.
Is the coil making contact with the outer chamber?
Another potential cause of problems with rebuildable tanks in particular is if the coil is making contact with the chamber that surrounds the build deck. This can happen on dripping atomizers too, but it’s more likely on RTAs (rebuildable tank atomizers) because the chambers tend to be more compact, withless building space.
It’s easy to work out if this is happening if you just take a look inside the chamber, especially if you can see inside without removing the cap. If your coil is making contact (or looks suspiciously close to the edge) all you have to do is work out how to move it a little to avoid the issue – normally you can move it up or down slightly, bending the “legs” and moving it away from the cap in the process. At worst, you might have to unscrew the posts and simply push the coil closer into them.
Of course, you need to ensure the coil is cool before you do any of this, and it’s better to either switch off your mod or unscrew the atomizer to avoid accidental firing.
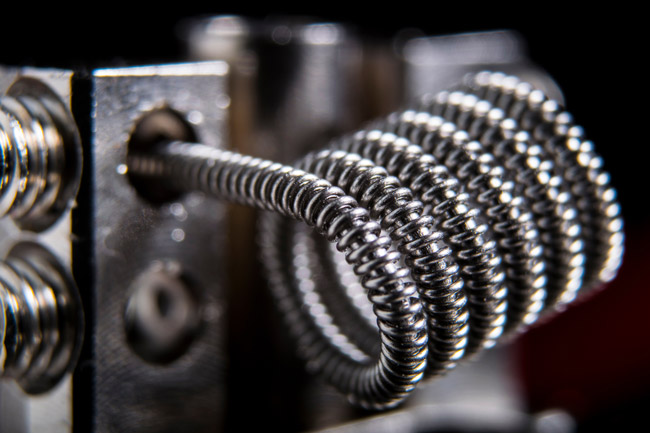
Check for breaks in the coil wire
Sometimes, especially if you’re vaping at higher power settings, your coil can just break during use. This will create a gap in the coil and lead to the circuit not completing, which will lead to your mod throwing up the “No Atomizer” error because it can get a current flowing. This is pretty easy to spot if you look at your coil, but unfortunately can’t be fixed: you just have to make a new coil!
In the unlikely event that it’s your mod causing the problem rather than your tank, there are a few things you can do to rectify the issue. Generally speaking, though, if it’s a problem with your mod the fixes are more risky to perform and it might just not be possible to solve.
Clean the connection point and look for debris
The only really easily fixable problem with your mod that could cause a connection issue is a build-up of dirt or debris around the connection point. Like the suggestion above for cleaning your tank or coil, you just need to get a cotton bud and clean around the threading and 510 connection.
You can use a bit of kitchen roll if there is a big juice leak (this is a good idea anyway because you don’t want it to get into the device’s internal circuitry), but generally speaking you’re just looking for anything that could be blocking the connection between the contact point at the bottom of your tank and the matching point on your mod.
Is the contact point high enough?
Just like older tank designs tended to have adjustable contact points on the bottom to ensure you could make a connection, it is technically possible (though not exactly advisable) to adjust the height of the contact point on your mod. It’s important to note that most modern devices have spring-loaded contact points so you probably don’t need to do this unless you have quite an old device.
If your device is new or still under warranty, it’s worth contacting the retailer about the issue, just in case they can replace the device for you before you do anything that might void the warranty.
However, if you’ve ruled everything else out and your tank works on a different mod, it might be worth trying to raise the contact point slightly. You’ll need a small (precision) flathead screwdriver to do this.
Around the sides of the (usually gold-plated) contact point, there should be a small space that you can get the tip of the screwdriver into. Put the screwdriver there and very gently wiggle the contact point up slightly, before repeating on the other side.
It’s better to be cautious when you’re doing this – move it a tiny bit and then re-check, then move it a tiny bit more and re-check again. If you go too far you could ruin the whole mod, so only do this if you’re out of ideas and don’t mind taking a risk with your device.
Unfortunately, some issues just aren’t fixable. For whatever reason, the mod could be malfunctioning or just failing to make a connection regardless of the situation. In these cases, you might just need a new mod altogether. It’s not the type of news you want, but if you’ve ruled everything else out and can’t fix the problem, it’s a sign of a more serious issue.
That’s a lot to take in, so to finish off, let’s recap the steps you need to take:
1. Check that your tank and mod are securely attached.
2. Remove and reattach the coil to ensure a good connection
3. Clean the coil and all connection points with a cotton swab
4. Try a new coil
8. Try another tank with your mod
9. Try another mod with your tank
10. If all else fails, the mod or tank may need to be replaced
Good luck!